Trying to make a ferrule for the Trout Ranger bait
I tried customizing my Masuranger for the first time by ferruling it so that I could attach a Hitotoki Works grip!
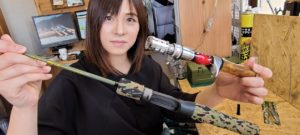
▼Hitotoki Works ultra-lightweight aluminum inner ferrule

We are currently receiving a flood of inquiries regarding customizing the Masu Ranger with ferrules.
I'm Mina, the public relations officer for Hitotoki Works!
Since Trout Fishing CH introduced a video on customizing an existing product with ferrules, we have been inundated with inquiries, especially about converting the Trout Ranger to ferrules.
https://youtu.be/wGucbh9yoik?t=185
The influence of YouTubers is incredible (>_<)
Most of the inquiries were about the ferrule diameter that would fit the Masu Ranger and how to customize it, but since Hitotoki Works has never actually customized the Masu Ranger, we were unable to give a definite answer...
that's why···
By actually trying it out, not only will we be able to use it for future inquiries, but we'll also be introducing the work method in detail!!!
So, since it's a customization that anyone can do, for some reason I decided to do it (>_<)
Check the stock at your local fishing tackle shop, then stop by a drugstore before heading off to the fishing tackle shop!
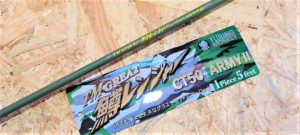
They only had the manly color army green, but I bought it anyway ^_^;
The CT40 was out of stock so I purchased the 5ft model CT50.
This time I will be using the CT50 to customize it with ferrules.
*I think the outer diameter of the blank is different for CT40, so I will introduce the ferrule conversion again once I get it.
We have started making the Masu Ranger ferrule.
Step 1 Cut the blanks
Cutting the rod right after buying it is a good move for me as a beginner fisherman haha
However, since this rod costs less than 3,000 yen, I would recommend it for your first cutting!
Now let's begin the cutting ceremony!
This time, in order to also pay attention to appearance, I decided to attach the ferrule leaving a little of the decorative wrapping that was originally wrapped around the front grip.
The insertion length of the ferrule is approximately 35 mm.
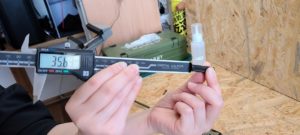
Therefore, cut it at a position that is 35 mm longer than the length of the decorative curl you want to keep.
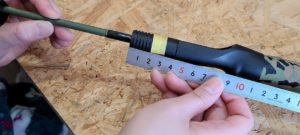
First, remove the front grip to measure the length.
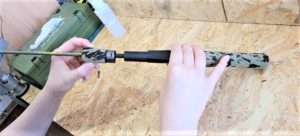
It was exactly 20 mm from the reel seat screw, so I'll cut it here.
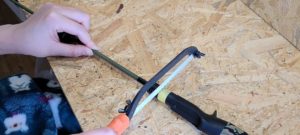
It was cut with a steel saw.
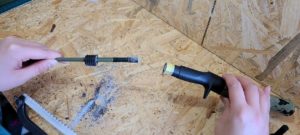
Step 2 Remove the carbon reinforcement
Here, an unexpected problem occurs (>_<)
I thought it would just be a glass blank, but when I cut it I found a mysterious object covering it (-""-)"
Because the rod is made of soft glass, a carbon pipe is used to reinforce the grip.
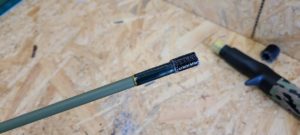
These are things you won't know until you try.
Unless we remove this, the ferrule cannot be installed, so we'll say goodbye to it.
Carbon has vertical fibers, so it needs to be scraped off little by little using a cutter.
This was quite difficult...
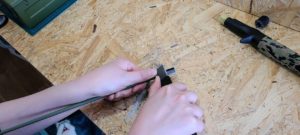
To make it easier to apply force and to stabilize the cutter blade, press with the thumb of your left hand while sharpening!
It was a difficult task for a girl with little strength, but I managed to peel it off after about 15 minutes.
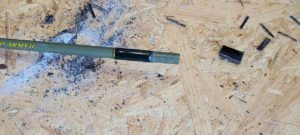
In this state, the outer diameter of the blank is measured to be approximately 7.1 mm.
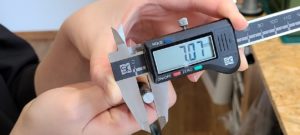
Therefore, the ferrule you should use should have an inner diameter of 7.2 mm!
Step 3 Remove the thread
When the thread is wrapped around it, the outer diameter is too thick for the ferrule to fit in, so leave only the amount you want to keep and peel off the rest.
Use masking tape to mark 35 mm from the cut part, which is the insertion length of the ferrule.
Use the tip of a cutter blade to expose the end of the thread, then you can peel it off!
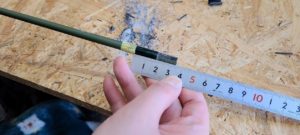
I was able to peel it off nicely.
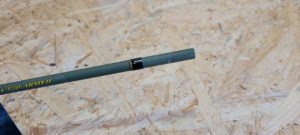
I inserted a 7.2mm ferrule and checked, and it fit perfectly with no play!!
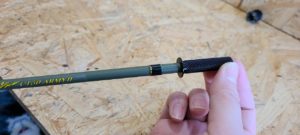
Normally, there is a gap between the ferrule and the blank, so you need to use gap-filling tape to make adjustments to eliminate the gap, but this time there was no need!
Step 4 Glue the ferrule
Once you have confirmed that there are no gaps or rattling, it's time to start gluing.
Uses a strong two-part epoxy bond.
Pour out equal amounts of solution A and solution B to about 2 cm.
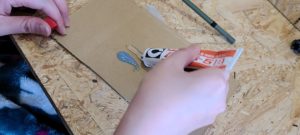
Mix thoroughly until it becomes cloudy and incorporates air.
Please note that if the stirring is insufficient, it will cause poor effectiveness.
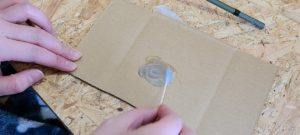
Once thoroughly mixed, apply the adhesive to the inside of the ferrule.
If you apply the adhesive only to the blank and then glue it, the adhesive will be pushed out and may not penetrate sufficiently into the interior.
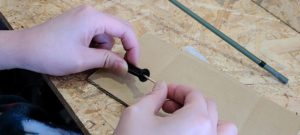
After applying the adhesive to the inside of the ferrule, the adhesive is then applied to the blank as well.
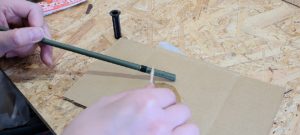
Once the adhesive is applied, insert the ferrule.
The air wouldn't escape and even when I inserted it, it was pulled back, so I had to bend the ferrule as hard as I could to let the air out.
If you insert it too far, excess epoxy bond will squeeze out.
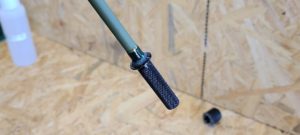
Wipe off any excess epoxy glue with tissue.
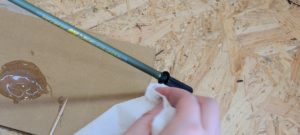
Wipe off the adhesive several times until it is completely hardened, hold the ferrule with your hand to prevent it from being pulled back by the force of the air inside, and wait for it to harden, and then it's complete!!
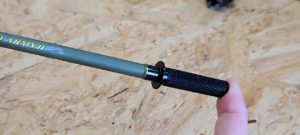
It quickly changed into a cool grip from Hitotoki Works ♪
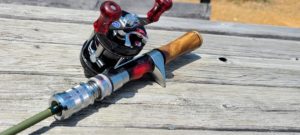
Please see the blog below for instructions on how to make a grip.
▼Click
The Masu Ranger is made of glass so it is quite soft, but as a beginner I find it easy to throw and just right for me.

